Tuesday, November 27, 2012

Addie's Sugar Plum Fairy Theatre

Now's the time to pick up ornaments and other items that you won't find during the year, and especially if you find them on sale.  Hobby Lobby is great to have items on sale, before the season and I found this uber-cute ballerina among the ornaments.  Wow!  She looks just like a sweet little girl named Addie (Addison) who is the daughter of a good friend of ours.  Her daddy is probably the person who can make me laugh like no other.  In fact, our group movie nights or visits usually end up with my returning to a "giggle box" as my dad used to call me.  This little Sugar Plum Fairy box is another project made using a cigar box.  


The bon bons and other sugary treats are all stamped and heavily glittered.  Then they are placed in the box using dimensionals.  One of the pictures was taken at an angle to attempt to show there is depth to the elements.  My photography skills are not so good and the photos do not show some details. 

The background is a piece of cardstock which was sponged with shades of pink, soft green, and aqua to look "dreamy" and kind of like sherbet, but again the photos do not show that detail. 

Because our friend is a single dad I am making this little theatre box for Addie to keep at his home.  He has brought so much laughter and friendship to our lives.  His eyes light up every time he talks about Addie, his little Sugar Plum Fairy Princess!  And the little ballerina does look just like her!!!


Monday, November 26, 2012

Going to the Birds

Here's an idea for a little gift that you can give neighbors, teachers, friends, co-workers or anyone who you want to give a "little something-something" to, and when you don't want to start a big gift giving tradition.

This gift not only goes to the recipient, but it also is "going to the birds".  Just pull out your favorite bird stamps, sprigs, cones, etc.  Here I lightly sponged around the edges of the cardstock for the "labels" and gift tags.  Then I stamped using tones of greens and browns.  Don't have my shades?  Not to worry because this project is just as pretty using other tones of green!


 To give the celophane bags additional strength on the bottom, I use heavy clear packing tape!  I also use that same tape to attach the "label" onto the front of the bag.  Fill the bag with bird seed, tie off the top and add the tag.

Another thing you can do is to put a list of the particular bird seed or type of bird on a small "label" on the back of the bag. 

Note:  Bird graphics are often seen on old greeting cards and post cards during the holidays.  As long as the image you use is a realistic looking bird, you can use any variety of bird.  I don't think a "cutesy" bird image would give the desired effect, so look for realistic looking bird stamps.  OR, this would be a good project to pull out an image from The Graphics Fairy site.  Just click on her link on the left side of my blog and you can go through her archives for pictures of birds. 

Holiday Post Cards

There's just something about vintage images that draws me in and get my creative juices flowing.  The other day I found two large stamps with vintage holiday images at Michaels.  I know I stood there for about five minutes with my mind imagining all the ways I could use those stamps.  Anyway, the post card stamp in its entirety is the one with the houses in the middle.  I used markers to ink the stamp so as to use multiple colors.

But to take it a step further and get more use from the stamp, I inked the outside images in Handsome Hunter and then the inner circle in a red shade and stamped that portion onto a blank card front.  Then I inked portions of other stamps to fill the inside of the "post card frame" that I first stamped. 

The second stamp I purchased that day at Michaels was the large flying Santa, swooping down to land on a housetop (or make a U-turn if you were bad and he by-passed you...ha ha).  The post card with the "big buck" is using one of the stamps from the old retired Noble Deer set, which I use for all seasons and occasions.  And the last image is what I call the Norwegian church.  That stamp has trees also, but I also added a few small ones here and there to fill in the oval and give it some depth to look like a deep forest.  I added lots of glitter onto the Norwegian church scene.

The images are of an old post card, but this is actually a card front with a greeting inside.

 
TIP: On some of the cards I lightly sponged an
oval shape in Pool Party ink before stamping the
post card images.  I think it just adds to the
wintery look and made the center image really
stand out.  The sponging is optional, but I seem
to love getting my fingers inky....anyone for
green fingers?

I Love "Mixers"

Well I am geared up for holiday parties this year.  The other day I was trying to remember last year's parties and gatherings and just couldn't.  Then I remembered the curse word called "shingles".  Yep, I spent the whole month of December (and part of January) with a case of the shingles.  I missed EVERY holiday party, Christmas shopping, and all the other things you do for the holidays.  It's no fun sitting in a chair with only a t-shirt and undies on for five weeks (clothing....ouch).  Anyway, my suggestion to all of you is this: the best Christmas gift you could give yourself or a family member is to go get a shingles shot.  Although expensive, it costs far more in pain and suffering and missing an entire Christmas than the cost of getting the shot.  

Well, another type of mixer (besides parties) is in mixing your stamp sets.  I very often pull out a stamp from one set and mix with another.  It gives you endless possibilities!  For instance, the Noble Deer set has a treeline image that I use constantly.  Notice it on the flying Santa card as well as the snowy cottage card.  Also, the Beautiful Season trees (large trees) can be mixed with many, many other stamps.  Here I've used the Beautiful Season trees with the images of children playing in the snow.  And the stamps don't have to be from the same season.  Noble Deer stamps are not Christmas....but I use all the images during the holidays.  You'll see in the next post that I used the "big buck" stamp from that set, combining it with a generic post card stamp that I picked up at Michael's on sale.  And to get even more use from your stamps, try inking (using a marker) only the portions of the stamp that you want to use and mix with others.  The possibilities are endless!!!  Now go enjoy some "mixers".....both the party type and the stamp type!

Sunday, November 25, 2012

Cards by Gwen

Photos of these wonderful cards were shared by a stamper in Hot Springs Village.  Gwen has been stamping and creating for quite a long time.  She always has unique ideas with her projects.  These cards use a variety of techniques using dies, embossing powder, paper embossing and some of the images are colored in. 
Click on photo to enlarge
I love, love, love these cards because they are clean and simple, but not too simple.  And her use of stamps and different images really makes for a cute collection.  Anyone receivng one of her cards will surely be touched that she has shared a little bit of herself with them.  Thanks Gwen for sharing!!!!
Click on photo to enlarge


Friday, November 23, 2012

This One's for Liz

This is for Liz in Houston who sent the nicest e-mail "Guess Who's Back".  I had to chuckle because that could be a good thing or it could be kinda like a bad cold that keeps returning (just kidding Liz).  I'm glad to be back with projects.  This blog will include all types of projects.  I will continue to show stamping projects, but I like to take them to the next level so you can get creative and let your imagination take flight. 

Anyway, for Liz and all the SU gals here's a slightly different take on use of the stamp set and accompanying dies "Ornament Keepsakes" that SU has available at this time.  As usual I was experimenting to see what I could come up with mixing and mixing and layering and layering until finally I came up with.....well not really a ponsettia and not a snowflake, but they are very pretty and I guess a hybrid.  I am planning to use them on gift packages. 

They are so easy to make.  Just stamp and die cut, using not only stamped images but also papers (including some striped shiny gold gift wrap).  To make them sturdy I used a hot glue gun, alternating between peaks and valleys. 

CLICK PHOTO TO ENLARGE

For those with kids, this would be a fun project, but I would advise that you limit the assembling using a hot glue gun to adults only.  Even so, I usually end up with a blister or two.  It seems if I don't have ink on my fingers, I'll have a boo boo or two from a hot glue gun. 


CLICK PHOTO TO ENLARGE

If you are not familiar with SU (Stampin Up) then you must check them out.  Each year they are chosen THE BEST in many categories of craft supplies.  And colors.....well I encourage stampers and crafters to get a little wild and out of your comfort zone.  You might just be surprised how you react to color. 

Monday, November 19, 2012

Natural Little Christmas

This was a bird house that I had painted years and years ago.  After I finished painting the birds, the house just sat there collecting dust in the basement.  Here's an example of how you can take out an old item and make it into a mixed media project.  The house has birds painted around three sides but the layered paper embellishments are what make it pop.

It almost looks like a Black Forest cuckoo clock house (or am I cuckoo?).  Also, don't the birds look like their feathers are fluffed out trying to keep warm during the holidays?

 Again the design elements have a lot of glitter on them but somehow my camera does not pick up the shiny glitter, or when it does it seems to change the diamond dust glitter into other shades..

Anyway, just look around your home, basement, or a flea market for something that you can repurpose and mix it up.  And try using mixed media for an added bit of quirkiness.


And again, Have Yourself a Merry Little Christmas this year.  And don't forget to feed your feathered friends during winter months.

Saturday, November 17, 2012

Christmas at the Lodge

With sunlight showing through

No sunlight showing through

CLICK ON PHOTOS TO ENLARGE

Two years ago I taught a workshop on making little diorama scenes using stamps and sponging techniques.  Those little handmade scenes were smaller and not as sturdy as this one that I am naming Christmas at the Lodge. 

The base is a wooden cigar box, with the lid cut off and a section cut out with a scroll saw on the bottom (which eventually becomes the front).  You could also use a cardboard cigar box, but I purchased about 20 of them a few years back and they are the wooden boxes. 

Cover the box as desired to fit your theme.   If you do not have stamps you could instead use vintage papers for your background scene.  Just remember that the light will show through with one sheet of background paper but the more layers glued inside the box, the denser the scene will be and less light will show through.  Remember, these dioramas are so pretty when you place them in front of a small lamp or you could place a small candle behind which could also provide some flickering. 

Because I was going for a vintage, Victorian look, I used very vanilla paper to stamp on.  I really added a lot of embellishments to this project because Victorian just screams of layers and opulence....even at the lodge! 

You could add any holiday saying, but one of my alltime favorites is "Have Yourself a Merry Little Christmas".  I am very nostalgic at heart and those old timey images and sayings make me smile a little.  Hope you enjoyed this post.  Now try making one yourself!  If you want to use vintage papers, click on Crafty Secrets, The Graphics Fairy, or Webster's Pages on the left side of the blog. 

The photos do not show the amount of glitter used on this project.  I went very heavy with glitter on the design elements, snow, snowflakes, trees, snow on rooftop, etc. etc. .  Once again after finishing this project I am covered from head to toe with glitter.  I prefer SU's diamond dust or Martha Stewart's fine glitters.  This fine glitter really reminds me of very old holiday decorations.
And whatever you do, where ever you go....Have Yourself a Merry Little Christmas!

Little Dioramas

I taught a workshop on how to make these little diorama scenes a couple of years back.  Basically you are making a box of sorts, with part of the front cut out so the light will show through the back side and will make your images glow. 

In these older dioramas I used different colors, aquas, sage, hunter green for sponging and stamping.  These smaller versions are the perfect size to mix in with other things, or on your mantel with other small items.  Because these smaller scenes are a little more delicate than the one in the next post I would suggest when you pack them up after the holidays, you use some crumpled tissue inside to keep them from getting crushed.

Next to painting with brushes, I love using sponges to get a soft layered look.  You can layer your shadings just as with painting but of course they are two totally different mediums and techniques.   Sometime when I get extra time I'm thinking about using sponges to paint a picture but that will have to come later...too many projects in my head right now. 


If you make any dioramas I would love to see them.  Just send me your pictures via e-mail.

Thursday, November 15, 2012

Dressed Up for the Holidays!

When giving a bottle of wine, sparking grape juice or other bottled beverage it's an extra special touch when you dress up your bottle with a hang tag. Here are some examples of bottle hang tags for the holidays. One of my favorites is the hang tag which covers a bottle of Peppermint Schnapps. You can add the mixing instructions on the back of the tag.  Click on the "Santa" Peppermint Schnapps bottle....now you know why Santa is winking his eye and why his cheeks are so rosy!!!!You can adjust your hang tag to fit any size bottle....tall or short.  I punch a circle near the top for the bottle neck and then score and fold beneath the circle cut out.  And be sure to dress up your bottle with a nice bow to top it off.  Now....tag you're it, so make up some bottle hang tags for your gift giving.  CLICK ON PHOTOS TO ENLARGE FOR DETAILS
 

Tag You're It!

There are several things I make every year and two of them are tags and bottle hang tags.  The tags can be used for your gift packages or I love to use them when giving food gifts such as cranberry bread, etc.  They are also cute to use on a wreath or garland.
The bottle hang tags are so much fun to make.  I use them to cover bottles of wine, sparkling grape juice (for those who don't imbibe) or other bottled beverage.  For those who didn't follow my previous blog I'm adding some of the previous years' tags onto this post. 

As always, I like to make up quantities of design elements and just sit down and pop them into place.  And don't be afraid to add glitter to your tags.   From now til the holidays my friends will see me with glitter everywhere....my face, hair, clothing.


The tag shape is an old retired Sizzix die.  But you could hand cut any shape or size.  I'll have other shapes to share later.  Don't be afraid to use unexpected colors during the holidays such as soft pinks and aqua, which both give an old timey and sometimes retro look to projects.

CLICK ON PHOTOS TO ENLARGE FOR DETAILS

Wednesday, November 14, 2012

Layered Snowflakes

I love layers, textures and glitz during the holidays.  I'm calling these "layered snowflakes".  When I was giving instructions to my workshop ladies I had several bits of advice.  I have always said "it's only paper!" because sometimes the ladies would get caught up in overthinking a project.  Also, I have found that I like to devote a little time here and there to "making design elements" ahead of time.  I cut with dies or scissors, punch shapes and stamp images in quantities.  Then I go back later and start piecing the project together.  That way I can let the creative juices start to flow and I don't have to stop as often to add this or that. 

CLICK ON PHOTOS TO ENLARGE FOR DETAIL 

That is what I did to make the "layered snowflakes".  I cut some snowflakes from chip board using dies and then cut the same shapes using various printed papers, in neutral tones.  I like to mix in the unexpected, such as using paper that has musical notes or printed words.  I don't use news print, but rather use paper that is more substantial.  Glue the printed papers onto the chipboard shapes, and add very fine glitter here and there.  I use dimensional tape when layering so the snowflakes are pretty chunky.  I often like to add brads (plain, pearl or rhinestones).  And, I love to add phrases to my projects, often hand cutting little banners that can float on top of the project.  Notice the "Happy Christmas" banner saying on one of the snowflakes.  
And have you noticed that paper rosettes are everywhere!  I love them because they give that old timey feel to projects.
 
These paper snowflakes could be used to decorate holiday packages, use on wreaths or garlands or as tree ornaments.  I think I'm going to use ribbons to hang them down in front of my entry mirror.  I am still getting familiar with this new blog program so for now if you would like instructions on how to make the "paper rosettes" just send me an e-mail and I will send back instructions.  For those in my area I would be glad to give you one-on-one instructions in the workshop.   

Snowflakes glistening, are you listening?  Bring that Winter Wonderland into your home.

Monday, November 12, 2012

Winter Wonderland

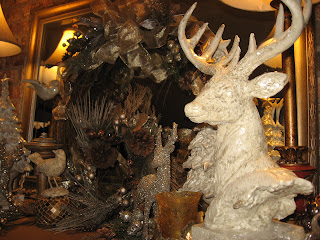
This year I wanted to change it up a bit in my living room and add the feel of a snowy holiday.  Winter Wonderland decorations could stay up a few weeks past Christmas because it will still be winter, past the holidays.  I had some ideas in my head and found a store that had their holiday items on sale early.  Because crafters and decorators must plan and work ahead of the season, it's great to find treasures on sale even before the start of the season.

I purchased a few, made some as well (see next blog post on making layered snowflakes), and pulled out a few items I had around the house (such as white birds).  The cloth covering my fireplace is a drapery panel which was also on sale! 

I haven't decided as yet everyplace I will use the handmade layered snowflakes, but they can be used on garlands, wreaths, hanging down in front of a mirror, or as a package decoration. 


TIP:  Don't forget to dress your lampshades.  A small inexpensive floral pick can be used to hang on the shade.  You can add a bow or a paper banner saying to really make a statement.  The lampshade will be lovely with the light on or off.  Also, the lamp on/off button is the perfect place to hang a coordinating ornament for that unexpected touch of whimsey!  Let your imagination be your guide as you go through your home looking for all things white, wintery, silvery, glitzy, etc.  Another tip is that you can pull out your jewelry and use your pearls or rhinestones for an unexpected touch, such as the wintery scene on my entry table which has pearl necklaces and is sitting on a stand (remember to give your vignettes some height here and there). 

Sugar Plum Fairy Kisses

I'm not one to have only one holiday theme, although I do try to separate the themes around my home.  Every year it's just not Christmas without my seeing the Nutcracker Suite, at least one or two times.  I found a version last year that is now one of my alltime Nutcracker Suite renditions.  The Nutcracker Suite - The Movie, brought out all my childhood memories and daydreams about dancing sugar plum fairies, Claire, The Nutcracker, King Rat, and all the other cast of characters.  The new movie version is not just a ballet, but rather it would also be entertaining for those not drawn to ballet.  This version also has a narrator which takes you along through the story, for those not familiar.  For those who appreciate the grandeur of Victorian Christmases of long ago, you might want to sit down and put all those distractions far away, and take in all the rich and vivid characters in The Nutcracker Suite. 
My front door, my dining room and kitchen are the areas I decorate with Sugar Plum Fairy theme.  Lots of sparkle, softer tones of pinks, purples, lavendars, greens with lots of berries and layering, oh and of course...those Sugar Plum Fairies!  CLICK ON PHOTOS TO ENLARGE.


TIP:  When making a focal point or vigniette, I like variations in height.  Pull out those large chunky candlesticks and they make the perfect pedestals that will put your decorations up higher and give them the attention they deserve.  Note the fairies all have their own little pedestals!  And don't forget to decorate those chandeliers and lighting fixtures.